Puppet for vSphere Admins
Over the last four weeks, we looked at Auto Deploy, which is automation for our VMhost provisioning process. Next up, we’re going to look at Puppet, a tool to automate our VM and Guest OS provisioning.
Recently, I have been working on deploying Puppet by Puppet Labs in our work environment. Puppet is a provisioning and configuration management system. It has been made famous by its ability to simplify cloud management for those running at scale, such as the Obama for America campaign that leveraged AWS and Puppet. Manually provisioning and configuring nodes scales linearly, or worse – 5,000 nodes requires at least 1,000 times the resources as 5 nodes. Automation with a tool like Puppet scales much more gracefully. Managing 5,000 nodes is only incrementally more difficult than managing 5, and growing to 50,000 or shrinking to 500 is just as easy. There are a number of other similar products you might be interested in – Chef, Ansible, and Salt to name a few.
I am interested in Puppet for two primary reasons. First, it has a lot of mindshare and a friendly community. You can easily find numerous blogs addressing common problems, there’s an active irc channel for problems you can’t solve with the help of a search engine, there’s a gigantic public module repository (called Puppet Forge), and you’ll find many candidates who already know Puppet as you grow your team. Second, VMware has invested $30M in Puppet Labs. The increased interaction and development has already resulted in Puppet adding some VMware cloud provisioning features and should ensure those features mature. This should help round out their Software Defined DataCenter (SDDC) efforts.
This series of articles on Puppet will be highly iterative. At first, we’ll still be doing things manually, but we’ll keep layering on more automation as we go. In some cases, we’ll be creating something, then tearing it down and replacing it with a more automated solution. Never fear, everything has a reason. I won’t show you something that won’t come in handy later – the fundamentals matter.
These articles are also aimed at vSphere admins, not developers, who may not be as familiar with some of the tools at hand. That’s okay, Puppet’s a good pathway from Ops to DevOps and a great tool for implementing an SDDC.
Today we will start with the process for standing up a puppet master in your lab. We’ll be using the vSphere Web Client, not the C# client. This should take about an hour, maybe a little longer if you don’t have a Linux template.
This is not intended to be a production setup. Before you implement puppet in production, you’ll undoubtedly want to investigate the scale at which you need to run and address your security concerns. We’ll touch on that a bit later in the series, but always test for YOUR scale before moving your configuration out of the lab.
Home Lab
My lab runs on two vSphere 5.5 hosts and vCenter 5.5, and my guest OSes are Windows 2008R2, Windows 2012 (Release and R2), RHEL 6.x and CentOS 6.5. A puppet master has to run on Unix or Linux currently, so I have chosen to use a CentOS 6.5 VM for the master. All of my guest OSes can be agents. You can check the full list of supported OS’s here.
There are two varieties of puppet, puppet open source, free, and puppet enterprise (PE), licensed per node. PE does come with free 10-node license, but we will stick with puppet open source so that your lab can scale past 10 nodes. This also forces us to take a peek at some of guts that PE hides because we’ll have to assemble the components ourselves. It’s a great opportunity to not just use, but understand, the system.
DNS
Before you worry about deploying anything, configure your DNS! Puppet relies heavily upon DNS, not just during use but also during installation. Both the master and the nodes should have valid forward and backward DNS. In my lab, I use named on an existing RHEL VM to manage my internal nelson.va domain and the 10.0.0.0/24 subnet. Here are my forward and reverse entries for the master and some sample nodes:
/var/named/named.nelson.va:
puppet IN A 10.0.0.35
server01 IN A 10.0.0.51
server02 IN A 10.0.0.52
server03 IN A 10.0.0.53
server04 IN A 10.0.0.54
server05 IN A 10.0.0.55
server06 IN A 10.0.0.56
server07 IN A 10.0.0.57
server08 IN A 10.0.0.58
server09 IN A 10.0.0.59

/var/named/named.0.0.10:
35 PTR puppet.nelson.va.
51 PTR server01.nelson.va.
52 PTR server02.nelson.va.
53 PTR server03.nelson.va.
54 PTR server04.nelson.va.
55 PTR server05.nelson.va.
56 PTR server06.nelson.va.
57 PTR server07.nelson.va.
58 PTR server08.nelson.va.
59 PTR server09.nelson.va.
If you’re using Windows, make your changes through the GUI or PoSH. If you’re using named, remember to reload the config or restart the service.
Create a Golden Image
Some of you may already have a golden image for your unix or linux distribution of choice. For everyone else, we’ll create a very plain image of CentOS 6.5 and turn it into a vCenter template. You will need a copy of the CentOS Net Install ISO and the URL of a fast mirror to continue (using the full ISO resulted in no networking or network config tools, so we’ll stick with the Net install that ensures networking is working).
Create a new VM called centos-6.5-base. The VM is assigned 1 vCPU, 512MB RAM, and 50GB thin provisioned disk. The OS is specified as Red Hat Enterprise Linux 6 (64 bit); if you set it to CentOS 4/5/6 you will not be able to use a customization spec. Before first boot, attach a CentOS net install ISO and mark it as connected. Now is a good time to modify any other standard VM settings, such as disabling floppy drives. When you are done with that, power on the VM to begin the install.
Perform a CentOS network install. My VM is configured to use dhcp, which I recommend (the VMware customization process won’t erase all static network configuration if your template is static and the deployed VM is dhcp, but there’s no issues going dhcp -> static). If required, set a static IP for the template, but do NOT use any of the addresses mentioned in the DNS section!. Reboot when complete.
In addition to the packages from the minimal install, I installed ntpdate, man, perl, and wget:
[root@centos-base ~]# yum install -y ntpdate man perl wget

...

Installed:
 man.x86_64 0:1.6f-32.el6 ntpdate.x86_64 0:4.2.6p5-1.el6.centos wget.x86_64 0:1.12-1.8.el6
Dependency Installed:
 xz.x86_64 0:4.999.9-0.3.beta.20091007git.el6 xz-lzma-compat.x86_64 0:4.999.9-0.3.beta.20091007git.el6
Complete!
Ntpdate is mandatory to avoid cert validity issues. Run ntpdate 0.pool.ntp.org now to sync the time. The rest are optional. Man is simply my preference, always a helpful tool, especially as you learn puppet. Perl is required for the initial VMware Tools installer, which you should absolutely have if you are using vSphere. As I mentioned before, we’ll be using the free version of puppet, but if you want to use PE, wget can make the install slightly easier and adds little risk to the image.
Next, install VMware Tools. Be sure to install at the console, not via SSH. There is a known issue where installs via SSH do not configure the vmware-tools service to start on boot. Add any other packages and software that you require in your golden image. Perform a yum update -y to bring all installed packages in sync with the latest CentOS updates. Reboot, even if you haven’t installed a new kernel, just to ensure there are no issues on a power cycle.
The above example is pretty simple and should suffice for a lab, but hopefully you’re using kickstart or another tool to reduce the manual touch points of golden image creation and updates in production. Among other issues, you should note that root is allowed to log in via SSH, certainly not a configuration that you want to escape the lab. The good news is that we will eventually be able to lock that down through puppet.
If you’re using CentOS and VMware, there are three other steps you need to take before converting this new VM into a template (other virtualization platforms are sure to have their own caveats).
- Always detach any ISO images and set the optical media to Client Device.
- Edit /etc/sysconfig/network-scripts/ifcfg-eth0 and remove the HWADDR and UUID lines; this allows the template to modify the ethernet config.
- Remove or blank out the file /etc/udev/rules.d/70-persistent-net.rules; this allows the OS to detect the new vNIC with the new MAC address after a template deployment.
These are the final actions before you shutdown a VM and convert it to a template. Right click on it, choose All vCenter Actions -> Convert to Template. Remember that if you have to modify the template, don’t forget to perform these steps again.
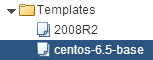
Here’s our completed template in the vSphere Web Client:
As mentioned in the DNS section, it’s important to have forward and reverse lookups working, and that includes the host itself. Ensure that the template’s hosts file contains an entry for itself. When I used CentOS 6.5, I did not have to do anything extra, but it’s possible that your deployment method or distro may not include this for you. You may also want to check this out on templates you deploy later on. Thank you to reader Alberto Ferrer for pointing this out!
Create a Puppet Image
Clone your golden image, either the one you had on hand or the one we built above. We’re going to add puppet to it and create a new template. While we’re building the master right now, the master will also have the agent software and you’ll need more agents down the road. This image will eliminate the step of installing puppet on all agent nodes. You should eventually replace your existing golden image with the modified image that also has puppet, but not until you’re done with your proof of concept.
Cloning a template to a VM takes two steps. First, right click on the template and choose Clone to Template… Name the new template “centos-puppetized”. Once the clone process is complete, right click on the new template and choose Convert to Virtual Machine… You’ll need to specify the host/cluster and when you hit finish, you’ll have the VM. Power it on and log in as root.
Installation of the latest version of puppet opensource is very simple. You need to add the Puppet Labs repository via https://yum.puppetlabs.com/el/6/products/x86_64/puppetlabs-release-6-7.noarch.rpm (plus an Optional Channel if you use RHEL instead of CentOS) and then install puppet with “yum install puppet”. A full set of directions for all OSes is available here, with repository information available here. Here’s what the relevant commands look like:
[root@centos-base ~]# rpm -ivh https://yum.puppetlabs.com/el/6/products/x86_64/puppetlabs-release-6-7.noarch.rpm
Retrieving https://yum.puppetlabs.com/el/6/products/x86_64/puppetlabs-release-6-7.noarch.rpm
warning: /var/tmp/rpm-tmp.FdiwxB: Header V4 RSA/SHA1 Signature, key ID 4bd6ec30: NOKEY
Preparing... ########################################### [100%]
 1:puppetlabs-release ########################################### [100%]
[root@centos-base ~]# yum -y install puppet
...

Installed:
 puppet.noarch 0:3.4.2-1.el6
Dependency Installed:
 augeas-libs.x86_64 0:1.0.0-5.el6_5.1 compat-readline5.x86_64 0:5.2-17.1.el6
 dmidecode.x86_64 1:2.11-2.el6 facter.x86_64 1:1.7.4-1.el6
 hiera.noarch 0:1.3.1-1.el6 libselinux-ruby.x86_64 0:2.0.94-5.3.el6_4.1
 ruby.x86_64 0:1.8.7.352-13.el6 ruby-augeas.x86_64 0:0.4.1-1.el6
 ruby-irb.x86_64 0:1.8.7.352-13.el6 ruby-libs.x86_64 0:1.8.7.352-13.el6
 ruby-rdoc.x86_64 0:1.8.7.352-13.el6 ruby-rgen.noarch 0:0.6.5-1.el6
 ruby-shadow.x86_64 0:1.4.1-13.el6 rubygem-json.x86_64 0:1.5.5-1.el6
 rubygems.noarch 0:1.3.7-5.el6 virt-what.x86_64 0:1.11-1.2.el6
Complete!
If you already had your own golden image, or some time has elapsed between building the golden image and this new image, now is a good time to do a yum update -y and reboot to patch the entire system.
As a last step, you should update the puppet configuration file, located at /etc/puppet/puppet.conf, and add the master’s name. The config is an ini-style file. Add the hostname of your puppet master, in my case puppet.nelson.va, to the main section in the key “server”. Here is the resulting puppet.conf, with the server key in the middle, and which is otherwise unmodified:
[root@centos-base ~]# cat /etc/puppet/puppet.conf
[main]
    # The Puppet log directory.
    # The default value is '$vardir/log'.
    logdir = /var/log/puppet

    # Where Puppet PID files are kept.
    # The default value is '$vardir/run'.
    rundir = /var/run/puppet

    # Where SSL certificates are kept.
    # The default value is '$confdir/ssl'.
    ssldir = $vardir/ssl

    server = puppet.nelson.va

[agent]
    # The file in which puppetd stores a list of the classes
    # associated with the retrieved configuratiion.  Can be loaded in
    # the separate ``puppet`` executable using the ``--loadclasses``
    # option.
    # The default value is '$confdir/classes.txt'.
    classfile = $vardir/classes.txt

    # Where puppetd caches the local configuration.  An
    # extension indicating the cache format is added automatically.
    # The default value is '$confdir/localconfig'.
    localconfig = $vardir/localconfig
As you refine your setup, you will undoubtedly tweak this file. Just make sure that you deploy the latest version of the file in your template so that all new VMs are configured correctly. You’ll defeat the purpose of puppet if you have to touch every new VM!
Check the optical media mapping, ifcfg-eth0, and udev files as mentioned previously, then halt the VM to power it off. Right click on the VM centos-puppetized and choose All vCenter Actions -> Convert to Template. You now have two templates, one of which has puppet installed.

Creating the Master
The last step is to deploy the master. Right click on centos-puppetized and choose Deploy VM from this Template… Call the VM “puppet”. Choose the correct location, host/cluster, datastore, etc. If you use customization specs (and you should!), check Customize the operating system in step 1d. My customization spec sets the hostname to the VM’s name and sets the IP information correctly, prompting me for the IPv4 address. The VM’s name is puppet and the IP address is 10.0.0.35. Once the template is deployed, increase the memory to 2GB RAM and power it on. Wait for the customization spec to complete before proceeding. If VMware Tools are installed, you will know it is complete when the VM summary tab shows the correct hostname and IP address.
Sidebar: Both the lab and production vCenters that I have access to sometimes suffer from an issue where deploying from a template attached to a vDS does not connect the vNIC on the created VM. I haven’t seen anyone else acknowledge this on the internet, so perhaps I suffer alone in silence. If this does happen to you, however, be sure to edit settings and mark the vNIC as Connected before powering it on for the first time.
If you are not using VM templates or customization specs, perform whatever steps you would need to deploy a copy of centos-puppetized and configure the hostname and networking properly. It is vital that the IP address, the VM’s hostname, and DNS are aligned before proceeding.
Log into the VM as your root user via SSH. The VMs hostname should be puppet and it should respond at puppet.nelson.va or 10.0.0.35. We need to install one additional package for the master, puppet-server. Install it with yum:
[root@puppet ~]# yum install -y puppet-server

...

Installed:
 puppet-server.noarch 0:3.4.2-1.el6

Complete!
The package puppet-server confusingly provides a service named puppetmaster. After installation, this service is neither running nor enabled in startup. We can ensure it is set to start on boot with chkconfig and start it with service.
[root@puppet ~]# chkconfig puppetmaster on
[root@puppet ~]# service puppetmaster start
Starting puppetmaster: [ OK ]
We also have to add a firewall rule to allow agents to connect on port 8140. Since this is a lab, you could just turn iptables off, but instead we will modify /etc/sysconfig/iptables to add a rule allowing dport 8140 and restart the service. Make sure you add the rule above the default deny and any other denies that may conflict. Since my install is minimal and I have not touched the firewall, it’s the third line from the bottom in the file. I also use iptables -L to ensure the firewall matches my specifications:
[root@puppet ~]# cat /etc/sysconfig/iptables
# Firewall configuration written by system-config-firewall
# Manual customization of this file is not recommended.
*filter
:INPUT ACCEPT [0:0]
:FORWARD ACCEPT [0:0]
:OUTPUT ACCEPT [0:0]
-A INPUT -m state --state ESTABLISHED,RELATED -j ACCEPT
-A INPUT -p icmp -j ACCEPT
-A INPUT -i lo -j ACCEPT
-A INPUT -m state --state NEW -m tcp -p tcp --dport 22 -j ACCEPT
-A INPUT -p tcp -m tcp --dport 8140 -j ACCEPT
-A INPUT -j REJECT --reject-with icmp-host-prohibited
-A FORWARD -j REJECT --reject-with icmp-host-prohibited
COMMIT
[root@puppet ~]# service iptables restart
iptables: Setting chains to policy ACCEPT: filter [ OK ]
iptables: Flushing firewall rules: [ OK ]
iptables: Unloading modules: [ OK ]
iptables: Applying firewall rules: [ OK ]
[root@puppet ~]# iptables -L
Chain INPUT (policy ACCEPT)
target prot opt source destination
ACCEPT all -- anywhere anywhere state RELATED,ESTABLISHED
ACCEPT icmp -- anywhere anywhere
ACCEPT all -- anywhere anywhere
ACCEPT tcp -- anywhere anywhere state NEW tcp dpt:ssh
ACCEPT tcp -- anywhere anywhere tcp dpt:8140
REJECT all -- anywhere anywhere reject-with icmp-host-prohibited
Chain FORWARD (policy ACCEPT)
target prot opt source destination
REJECT all -- anywhere anywhere reject-with icmp-host-prohibited
Chain OUTPUT (policy ACCEPT)
target prot opt source destination
Now that the master is running and reachable, let’s make sure something happens when agents try to connect. Puppet installs an empty configuration directory for your site manifest at /etc/puppet/manifests. A manifest, which has the file extension “.pp”, is a collection of configuration statements in puppet’s DSL (we’ll cover the DSL in future articles). The site manifest is always called site.pp. We will create the manifest and enter a single notification statement to ensure that agents are connecting to the master and that the master is serving the manifests. Here’s what that will look like:
[root@puppet ~]# cat /etc/puppet/manifests/site.pp
notify {"Agent connection is successful": }
After modifying the manifests, there is no need to restart the puppet-server service. Catalogs are compiled on-demand. Simply edit and save /etc/puppet/manifests/site.pp. Now, force the master to connect to itself as an agent with the command “puppet agent -t” (short for “–test”):
[root@puppet ~]# puppet agent -t
Info: Retrieving plugin
Info: Caching catalog for puppet.nelson.va
Info: Applying configuration version '1391016517'
Notice: Agent connection is successful
Notice: /Stage[main]/Main/Notify[Agent connection is successful]/message: defined 'message' as 'Agent connection is successful'
Notice: Finished catalog run in 0.05 seconds
You can see the notification on the second to last line. Congratulations, you now have a puppet master!
There’s a lot more work to do with the master and the agents, but you can start deploying VMs from your puppetized template immediately. When your manifests and modules are made ready, all of your VMs will be ready to receive their configuration. In the next article, we’ll start building manifests and importing forge modules on the master.

You have to add the machine name and IP on CentOS 7 because minimal doesn’t do it for you then puppet master nor agent work as expected.