Platform9 recently announced a vSphere Integration product. If you haven’t heard of Platform9 before, they offer OpenStack-as-a-Service for management of private cloud installations. Platform9 manages the OpenStack platform and you manage your virtualized infrastructure. You don’t have to know or keep up with the inner workings of OpenStack to have a working platform. This new product announcement expands the platform from the KVM hypervisor to the vSphere hypervisor.
OpenStack is a very complicated platform. Gaining the knowledge needed to design, setup, and maintain an OpenStack system is time and effort not spent on fulfilling your business goals. As the platform grows, more time and effort is required to stay current and upgrade your implementation. The use of an externally managed system saves you that time and effort and that can be put directly toward your business goals.
Disclaimer: Platform9 provided me with an extended free trial account for the purposes of this article.
How does it work?
Platform9 deploys an OpenStack controller just for you. They install, monitor, troubleshoot, and upgrade it for you. With vSphere integration, a local VM, called a vSphere Gateway Appliance (VGA), deployed in your vSphere environment communicates with your vCenter server and Platform9’s hosted controller, eliminating the need for a VPN or other private communication channel between the controller and vCenter.
Once the VGA is deployed and communicating, Platform9 detects your clusters and hosts and imports your templates as Glance images. You then have access through Platform9’s portal to manage images, deploy and manage instances, and configure multi-tenancy in your new OpenStack platform. The portal also provides a tab to monitor your infrastructure, manage ssh keys and API access, and set up Flavors (or ‘T-shirt sizes’) for deploying new instances.
In addition, the controller and portal are entirely optional. You can still use vCenter, PowerCLI, vim-cmd, and any other methods you were previously using to manage your system. If you provision a VM locally – or have existing VMs, as almost everyone will have – the VGA will detect these instances and show them in the portal. They won’t have Flavors attached, but you can perform all management functions on them just as you would an instance that Platform9 created. The reverse is true as well: you can take an instance that Platform9 deployed, power on/power off/remove it in vCenter, and the portal will update to show your changes. There can be a slight delay as the VGA must discover and report the changes, however.
Platform9’s low investment and learning curve means that you can experiment with OpenStack without committing to it fully on day one. You can take your time learning the OpenStack API without abandoning your existing investment in vSphere APIs and workflows. You can use the portal or ignore it as you desire. You can also easily “back out” of Openstack by removing the Platform9 VGA entirely.
The last bit I think is very important to those of us with home labs, which is where my interest began. The thought of tying my home lab to OpenStack honestly scares the crap out of me. My home network relies in part on my home lab functioning. Without it, the spicestreaming media does not flow and that’s a clear SLA violation (Spousal Level Agreement, not the other SLA). That’s the surest way to reduce the lab budget to $0, and no-one wants that! With Platform9, I can add and use the OpenStack control plane and the only modification to the lab is a single additional VM. Now that it’s in place, I can experiment with OpenStack without violating the SLA. If I decide that OpenStack isn’t something I desire anymore, I want to rebuild it entirely, or I want to shelf it for 6 months, my lab remains intact throughout. That flexibility is huge.
Platform9 does not support all of the OpenStack projects. Heat is available as an API with a GUI forthcoming. Ceph/Swift can be added on. There is a core orchestration engine available. Networking is based on Nova-networks rather than Neutron. Each of the projects that are available are currently based on the OpenStack Kilo release.
Getting Started
Platform9 has very low requirements for working with vSphere. You will need a vCenter 5.5 server and a cluster with DRS enabled. You’ll also need one template, though you can build one after initial setup. That’s it! Your cluster can even be one host. I’ve used nested ESXi with a non-nested VCSA VM (nested VCSA is a tad too slow for me). Unfortunately, you cannot use Platform9 with vCenter 6.0 in a supported configuration, yet, though others have reported success.
To get started with Platform9, sign up for a free 15 day trial. You cannot use a common webmail email address to sign up, which is a bit annoying. The company name does not need to match the email domain, though. Once you submit the request, Platform9 will contact you with login information in a few hours. It’s pretty fast, but it’s not immediate.
Once you have an account, log into your portal. You’ll see something similar to this:

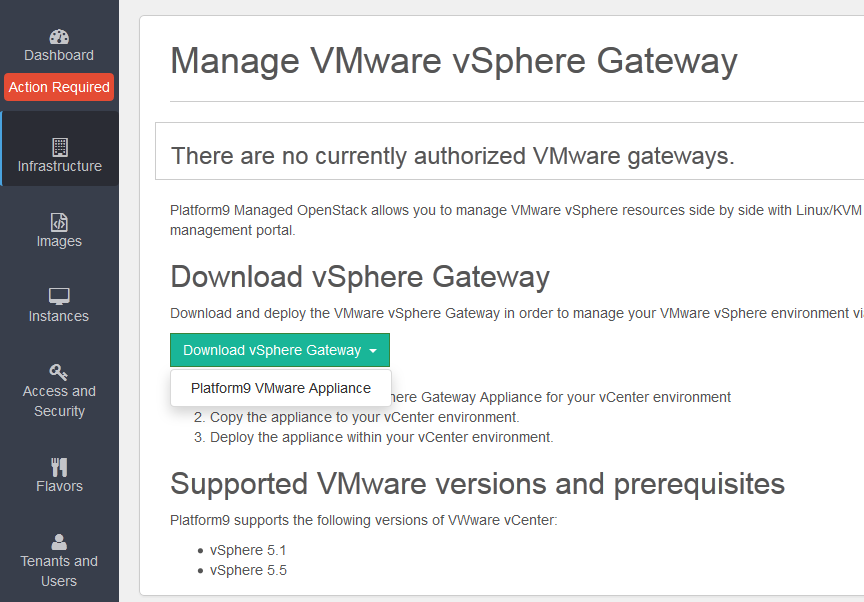
You’ll be prompted to add a host during the initial setup. Click on the Manage VMware Gateway link and you’ll be sent to the Infrastructure tab. Here you can click on the Download vSphere Gateway link and select Platform9 VMware Appliance. You’ll be gifted with an OVA that’s customized to work with your Platform9 portal and OpenStack controller – don’t share it with anyone else!
Deploy the OVA in your environment however you normally deploy an OVA. You’ll need to provide an IP address, a valid login with at least the minimum documented rights (read the fine print at the bottom, assign rights in the correct places!) and an optional proxy server/port. This VM is your vSphere Gateway Appliance or VGA.

Once the VGA is deployed and powered on, it will communicate with Platform9 and automatically attach to your account. Do not accept VGA downloads from anyone else, unless you really trust them with your systems! It may take some time for the VGA to sync with Platform9. If you have issues, I suggest you delete any downloaded OVAs, download a new one from the portal and redeploy before engaging support. When the VGA is communicating, you’ll see this in the portal’s Dashboard:
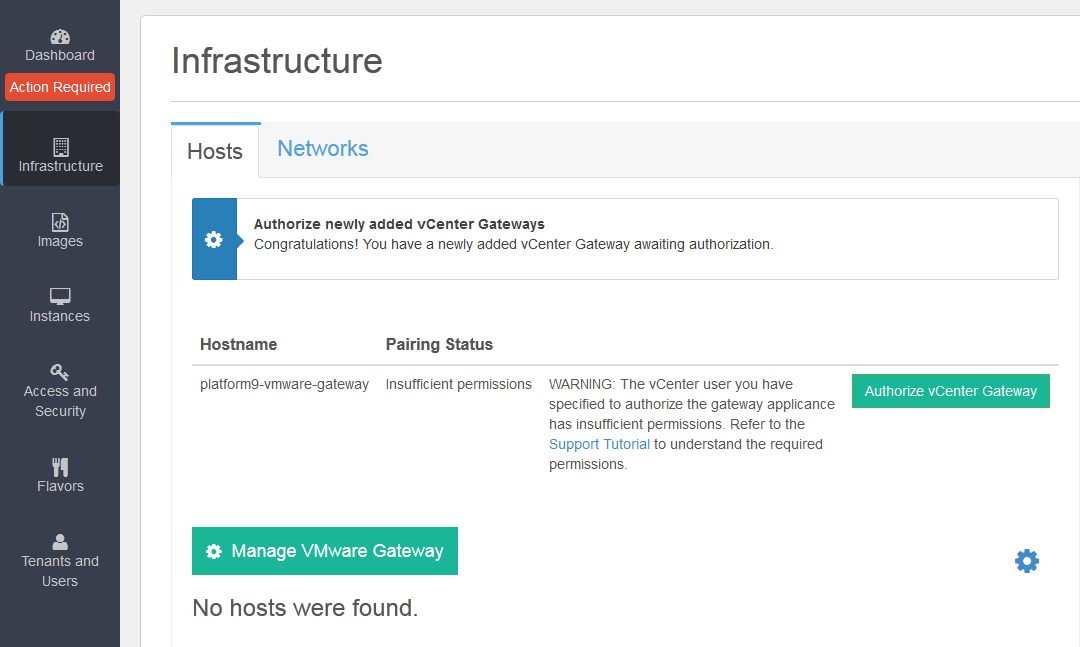
Note: The permissions warning appears when using an unsupported vCenter 6.0 server.
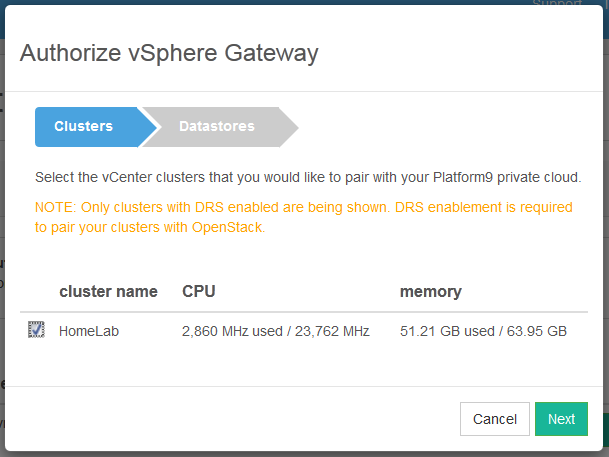
Click Authorize vCenter Gateway and you will be presented with two popups to select the cluster(s) and datastore(s) that you want Platform9 to control.
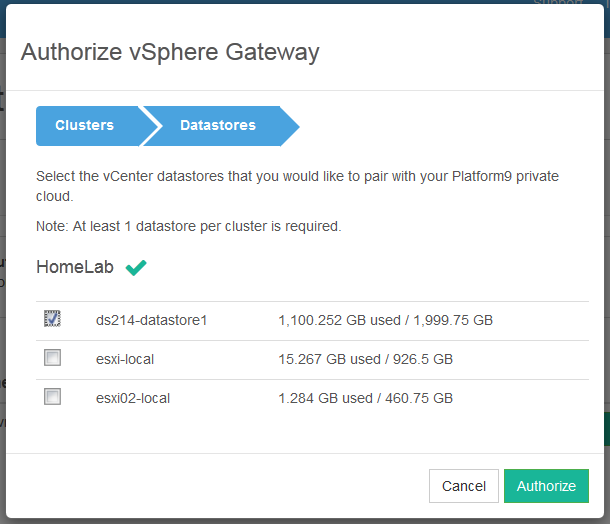
You can edit this at any time, with a restart of services and short interruption. I like that you can control what datastores are available; you can hide the local datastores you never use or create segregation with other users of the vCenter infrastructure. You can always come back here and edit the cluster/datastores to change what is available to Platform9. If everything goes well, you’ll see some changes to the Infrastructure tab. While it’s discovering, you’ll still see that a host needs authorized on the Dashboard tab and all 0’s for compute/memory/storage/network in Infrastructure. When discovery is complete, you’ll see numbers and a utilization dial. This part can take a few minutes, go stretch your legs for a bit while Platform9 does its work.

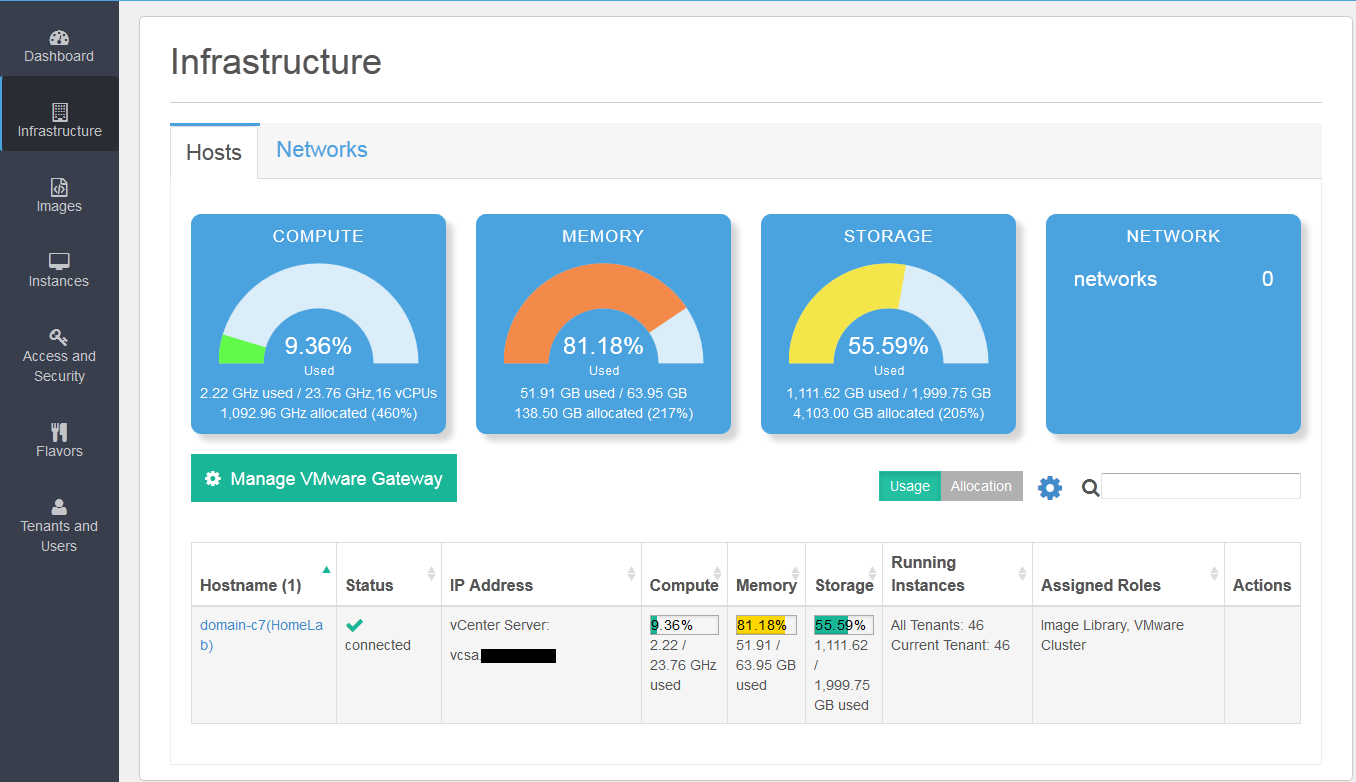
With everything done, you’ve got a working OpenStack platform!
Images, Instances, and Flavors
At this point you can probably explore the portal just fine on your own, but I’ll point out a few things to look at. Go to Images and you’ll see any templates you have in your vCenter.
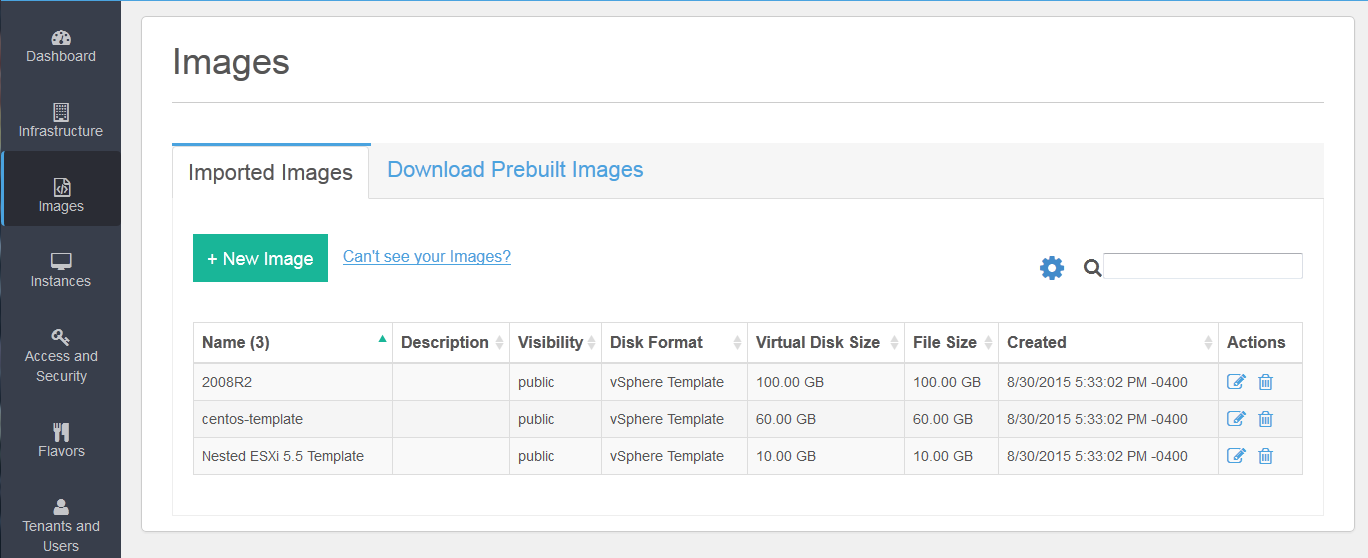
You don’t have to do anything to import existing templates. If you add templates to vCenter, they’ll show up here in a few minutes. If you hit the + New Image button you’ll get a popup telling you where you can put images on the gateway itself. There are unfortunately no prebuilt images on the Download tab yet.
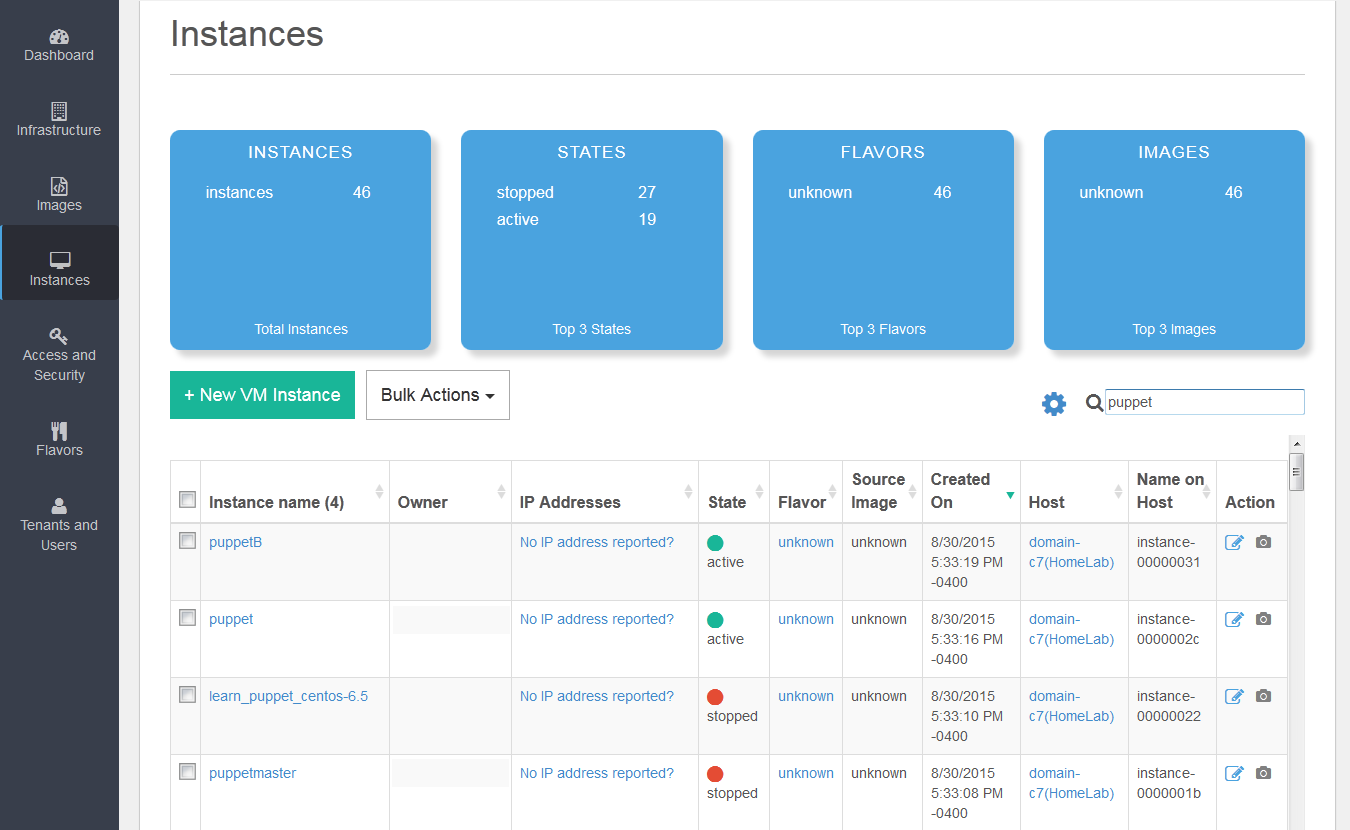
Instances can be managed on the Instances tab. You can type in a partial name and the list will reduce. You can Start, Stop, Suspend, Resume, Reboot, Snapshot, Add tags, Remove tags, Change Owner, and Delete VMs using the Bulk Actions tab. The Edit icon to the right of each instance, however, only lets you rename or manage tags for the instance. You can also add an instance using the + New VM Instance button.
Before you add a new VM, change to the Flavors tab. Platform9 provides you with some “t-shirt size” flavors that are similar to what you would see in Amazon Web Services. Pay attention to the sizes available and what your Images require. When you deploy an instance, you can only choose a flavor that the new instance could fit in. One of my templates is 1vCPU/1GB RAM/60GB HD. The only flavor that matches is m1.xlarge which requires 8 vCPU. When I tried to deploy this in my nested ESXi cluster, I got back the very vague error “No host is compatible with the virtual machine.” My nested ESXi only had 2 “physical” CPUs so this failed, but the error wasn’t exactly intuitive (vCenter actually provided the vague error message, Platform9 passed along the error message as-is). You will probably want to define your own flavors that more closely align with your template sizes.

Notes
A few things I noted:
- You must use a non-webmail email for signup.
- The hostname on a VGA is always ‘platform9-vmware-gateway’ regardless of the VM name assigned during OVF deployment. I’m not sure if it’s possible to deploy two VGAs and if so, how to differentiate between them in the portal.
- There is no vCenter 6.0 support, though the VGA will work with vCenter 6.0. This is unsupported, don’t be surprised if there are surprises.
- Platform9 has no problem working with Nested ESXi!
I hope that Platform9 will loosen up restrictions for webmail signups, as many vExperts probably do not want anything tied to another email, and I look forward to official support for vCenter 6.0.
