Today, I upgraded a vCenter appliance on 6.0u3 to 6.5u1. I had been waiting for this forever as we wanted to get to 6.5, but had erroneously missed a line in the 6.0u3 release notes that said it could not be upgraded to 6.5! Happily, 6.5 Update 1 remedied that, so away we go!
You cannot use VAMI to do major/minor upgrades, only point releases (Update X) and patches, so you must download the new ISO and use the installer. You can find the ISO here and some great instructions on the installer in Mike Tabor’s Upgrade vCenter Server Appliance 6.0 to 6.5 article. The installer itself is pretty foolproof and Mike’s article addresses most ambiguities, so I just want to detail a few things I ran into that may help others.
- Download the ISO before the change window begins, not after. That can be a problem, or so I’ve heard 😀
- Turn off DRS during the upgrade. It’s mentioned in step 15 and in a warning in the installer itself, but I think it’s better to disable it before you get to that step, just in case DRS kicks in between when you start and that step.
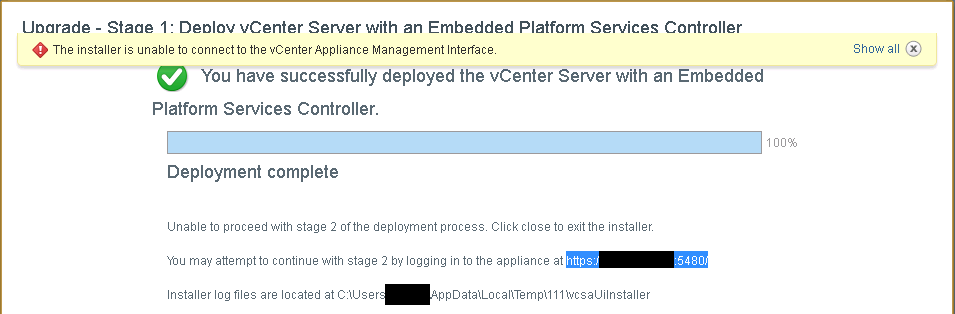
- The process involves a temporary IP for the new VCSA VM, so the old and new can be online simultaneously to transfer data. Add the temporary IP to any firewall rules involving the existing VCSA! If you do not do this, you may run into an error when stage 1 ends and the installer cannot reach the VAMI interface on the temporary VCSA. If you forget, you can proceed with Stage 2 at the URL specified, though you do have to enter a lot of auth information again:
- If you have an external VUM, you need to either start the Migration Assistant on it or disable the extension
com.vmware.vcIntegrityor the installer will not get started. I chose to disable the extension as the end goal was to use the new internal VUM service. - The password policy has changed, so you may not be able to keep the same root password for the new appliance.
- For Stage 2, Mike very optimistically says “after a few minutes the vCenter Server Appliance upgrade should complete.” With just 2GB of data to migrate, it still took close to 45 minutes, and some individual steps seemed hung for close to 10 minutes at a time. Don’t worry if it takes a while, as long as you’re seeing progress overall.
After performing the upgrade, you’ll surely have other tasks, such as updating extensions like vRO and vROps, so don’t delete any snapshots right away in case something goes awry.
