I just configured a brand new vRealize Orchestrator Appliance v6.0.3 with a vCenter Server (not appliance) v6.0U1. The deployment of the OVF is pretty simple, but configuration was trickier than I expected. VMware’s guide is accurate if everything works well but painfully inadequate if you require any troubleshooting. Take a run through the guide, I’m not going to speak to what it does cover, and if you have problems, maybe one of these tips will help you.
Authentication
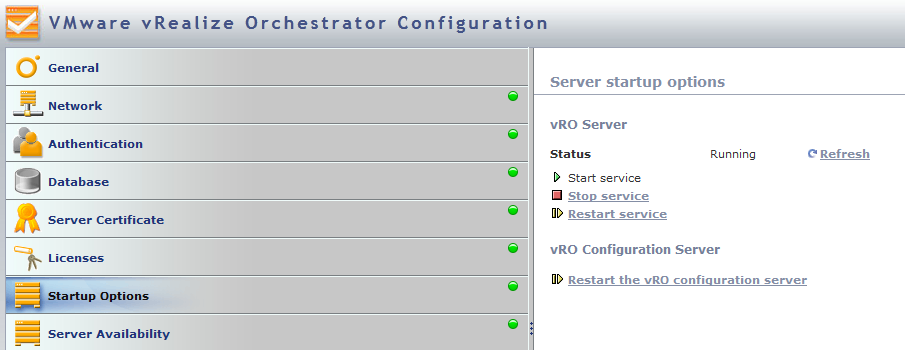
Any time you change authentication, you MUST restart the vRO service. You may see all the status icons go from green to red to blue and back to green, which makes it appear that some services are restarting, but they aren’t. If you’re not sure, click the restart button as shown below. Bonus: when the page responds and says the service, the service is ready to use, unlike some other VMware products *cough*vSphereWebClient*cough*
Registering with vCenter
This part has always been painful because it seems to be error prone but very opaque to debugging. Here’s what I did to solve this.
- Lauch the vRealize Orchestrator client and log in.
- Navigate to workflows (blue flowchart icon).
- Expand Library > vCenter > Configuration.
- Run the Add a vCenter Service Instance workflow.
- Run the Register vCenter Orchestrator as a vCenter Server Extension workflow.
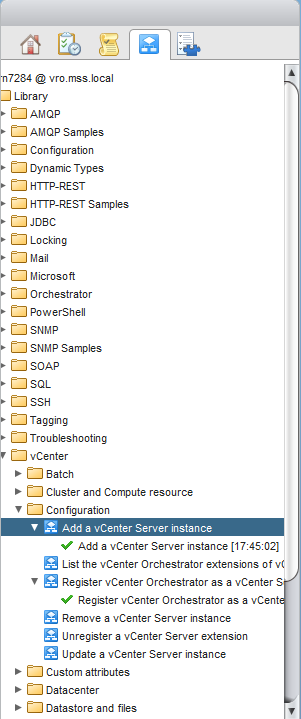
You should now see the extension com.vmware.vco at https://vcenter/mob/?moid=ExtensionManager (insert your vCenter hostname). If not, good luck! ¯\_(ツ)_/¯ That’s the state of the documentation. I’ve been there and unless you have an existing vCO extension that’s conflicting – delete, then rerun the two workflows – I’m not sure what I can offer.
vRealize Orchestrator Web Client Plugin
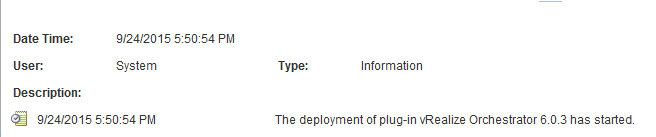
The last thing I had to figure out was how to get the Web Client plugin working. After registering, I still didn’t see the vRO server listed in the vRO plugin. Log into the Web Client as administrator@vsphere.local and navigate to Administration > Solutions > Client Plug-Ins. Click the Check for New Plug-Ins button. You’ll be directed to the Events tab. You should see an event indicating the plug-in deployment has started. Refresh in few minutes and you should see the completion event

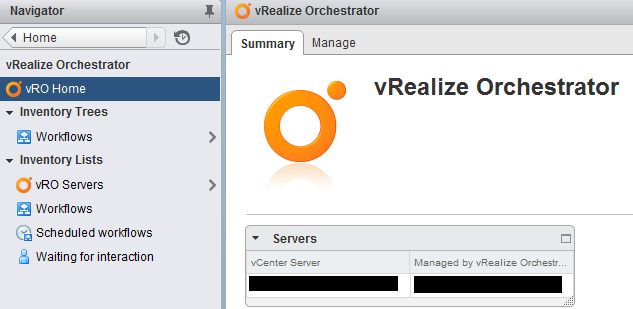
You’ll need to log out and back into the Web Client (preferably as your user this time) and when you click on the vRealize Orchestrator icon, you’ll see your vRO appliance listed on the right and a few extra icons on the left.
That wraps up the issues that I ran into. I hope this helps you. If you found alternative solutions, or have some information on other problems and solutions, please let me know in the comments and I’ll update this article. Thanks!

Thanks, struck the same thing, cheers for the post