A recent discussion on twitter about creating awesome PowerCLI output reminded me that the joy – and ease! – of creating your own PowerShell module needs to be spread.
If you do things the “right way”, by default you cannot click on a .ps1 file to open it. You need to launch PowerCLI (or launch PowerShell and import the PCLI snapins) and then import the file in whole or in part. Even if you create a new function that you want to use all the time, like a favorite “Get-SnapshotsIStupidlyLeftAroundForTooLong” function, it’s not there just by launching a PCLI/PoSH window. If you then want to modularize your PoSH into discrete parts and re-use them with other functions, you quickly end up with a very large .ps1 file that you import every time to so that all your functions are there. But they’re still functions, not cmdlets.
You don’t need to be a developer to create your own modules. Microsoft has some VERY in-depth documentation on modules that everyone should use. We’ll stick to the highlights as this is PowerShell Modules For Sysadmins. We’ll skip all the stuff about signing your code and making binary modules and focus on what most of us need every day – a way to modularize our PoSH code and streamline our ability to use it. I do encourage you to come back and look at code signing later if you plan to get serious about PoSH.
PowerShell 3+ ISE
The first thing we want to do is make sure you have PowerShell v3 or higher and the Integrated Scripting Environment (ISE) installed. In v3, Microsoft added a feature to auto-load modules when a cmdlet is used for the first time, so you don’t need to manage your modules quite as much. PowerShell v4 is the latest and greatest, but PowerShell 3 is viable as well. Please read the release notes – not all environments are supported! You do NOT want to mess up your Exchange installation because you loaded the wrong version of PoSH on the system you use to manage it. We’re all VMware admins here, so if needed just stand up a new RDP server or VDI instance specifically for PowerCLI and load PoSH3 or 4 on it. I went with v3 as we have it installed everywhere in production and I don’t want to find out at the wrong time I used a v4 featureset. Do whatever makes sense for your environment.
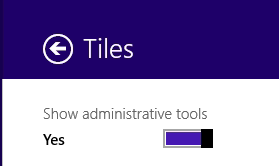
If you have Windows 8 or 2012 Server, you already have PoSH3. If you have Windows 8.1 or 2012R2, you have PoSH4. However, you won’t see the ISE icons by default, it’s part of the Admin Tools that are disabled by default. Hit Win-C to bring up the charms window, click on Settings then Tiles. Change the admin tools slider to yes and exit the charm. If you hit the window key now and start typing “powershell”, you’ll see the ISE applications listed.
![]()
Now that the ISE is available, launch it. The first thing to do is to check the version. I have seen at least one WMF upgrade display the wrong PoSH version until it was rebooted. You can do this with the command $host.version, the major version is what we care about:
PS C:\> $host.version

Major  Minor  Build  Revision
-----  -----  -----  --------
3      0      -1     -1
All set!
Load the PowerCLI snap-ins in the ISE
The PowerCLI cmdlets are, unfortunately, not modules. They are snap-ins. Follow the directions in my previous blog post, specifically the first half, to configure your profile to load the snap-ins at startup and restart the ISE. You can verify they are loaded by typing connect-viserver. You will be prompted for a server name if everything is correct. If you get a splash of red text, something went awry and will need fixed before we continue.
Find a function to convert to a cmdlet
The next step is to find a PoSH function or loop within a function that you can convert to a cmdlet. If you don’t have one, you’re in luck, I’ve got a few already on my blog. In my post on creating consistent distributed port groups, one thing we do over and over is to create a new DPG and edit it in four steps – get the VLAN, get the name, clone the reference DPG, configure the new DPG. It’s also in the middle of a bunch of other PoSH code, as we can see below. What if we just want to create a single DPG based off a reference DPG? We have to fill out the boiler plate anyway and still run at least 11 lines of code for one simple task. Surely we can shorten that.
$vDS = "DVS_Lab"
$Reference_DPG = "DPG_2_Switch_Management_10.5.0.0-24"
$DPGs = @{
     "5"  = "Developer_VMNet_10.0.1.0-24";
     "10" = "Testing_VMNet_172.16.1.0-24";
     "15" = "Production_VMNet_192.168.1.0-24";
     "20" = "iSCSI_A_172.17.1.0-24";
     "20" = "iSCSIS_B_172.17.1.0-24";
     "30" = "DMZ_192.168.2.0-26";
     "40" = "OOB_Network_172.16.255.0-24"
};
$DPGs.Keys | % {
     $VLAN = $_
     $DPG = "DPG_" + $VLAN + "_" + $DPGs.Item($_)
     New-VDPortgroup -VDSwitch $vDS -Name $DPG -ReferencePortgroup $Reference_DPG
     Set-VDPortgroup -VDPortgroup $DPG -VlanId $VLAN
}
We can single out the $DPGs.Keys loop and create a cmdlet that it uses. This would allow the loop above to call a single line, which a human at the CLI could also call without requiring building a hash first. How would we do that?
Powershell ISE to the rescue! If you haven’t used ISE before, let’s take a quick tour. On the left side are two panes. In white at the top are files you are editing, one per tab, the Script pane. Below that is a blue pane which is where the PoSH shell is, the Console pane. If you’re starting at a Console pane by itself, hit Ctrl-N to open a new file for editing. Hit Ctrl-S and give the file the name Clone-VDPortgroup (remember the verb-noun pattern of PoSH cmdlets) and type PowerShell Script Modules. This will result in a .psm1 file instead of the traditional .ps1. On the right hand side is a list of all cmdlets available to you. This list is dynamic, so as you add an import modules, they’ll show up here. Selecting a cmdlet shows you a simplified view of the parameters it accepts. You can fill in the parameters and use the Insert button to paste the command + parameters to the Console or Copy to put it in your buffer if you want to paste it in the Script pane. If you fill out the mandatory (*) parameters, the Run button will become active and it will run in the Console.
A couple of other cool shortcuts, and then you can look up the rest on your own:
- Ctrl-D – Move the cursor to the bottom of the Console pane, no matter where it was before.
- Ctrl-I – Move the cursor to the Script pane.
- Ctrl-T – Opens a new PowerShell tab. The Script pane is empty and the Console pane is a new session. Great for testing a script that was working in the previous tab and ensuring you didn’t type in anything manually that the script depended on.
- Ctrl-Tab / Ctrl-Shift-Tab – Move to the next/previous PowerShell Tab.
- F5 – Runs the entire contents of the currently selected file tab.
- F8 – Runs the selected contents of the currently selected file tab. Great to test one line over and over without running an entire script.
- Ctrl-Space – Type ahead works when you’re typing ahead, but if you backspace or use the mouse cursor to move around, it disappears. This shortcut starts it from wherever the cursor is, if applicable.
Here’s the killer feature, though – Snippets. In the scripting tab, hit Ctrl-J and you’ll be presented with a number of snippets that can be auto-inserted. I sure don’t know all the boiler-plate required for a cmdlet, or even a function. In our case, choose the first one, Cmdlet (advanced function). We’re not going to delve into all the fields at this time- this is PoSH for Sysadmins! – but most of the template is self-descriptive. Before we modify it, let’s take a look at the code we want to change:
$DPGs.Keys | % {
      $VLAN = $_
      $DPG = "DPG_" + $VLAN + "_" + $DPGs.Item($_)
      New-VDPortgroup -VDSwitch $vDS -Name $DPG -ReferencePortgroup $Reference_DPG
      Set-VDPortgroup -VDPortgroup $DPG -VlanId $VLAN
}
And let’s envision how we might change it to a single call:
$DPGs.Keys | % {
      $VLAN = $_
      $DPG = "DPG_" + $VLAN + "_" + $DPGs.Item($_)
      Clone-VDPortgroup -VDSwitch $vDS -Name $DPG -VlanID $VLAN -ReferencePortgroup $Reference_DPG
}
This only shortens the loop by one line, but it makes it a lot easier for a human to call it later:
Clone-VDPortgroup -VDSwitch "myVDS" -Name "DPG_101_iSCSI_B" -VlanID "101" -ReferencePortgroup "DPG_100_iSCSI_A"
With our format in line, we can start modifying the snippet that the ISE gave us. We need to add parameters for VDSwitch, Name, VlanID, and ReferencePortgroup. We need to use the information to call New-VDPortgroup and Set-VDPortgroup. That gives us this:
<#
.Synopsis
   Create a new VDPortgroup based on an existing VDPortgroup
.DESCRIPTION
   Clone the settings of an existing VDPortgroup onto a new VDPortgroup. The VLAN tag is changed on the new entity
.EXAMPLE
   Clone-VDPortgroup -VDSwitch "myVDS" -Name "DPG_101_iSCSI_B" -VlanID "101" -ReferencePortgroup "DPG_100_iSCSI_A"
#>
function Clone-VDPortgroup
{
    [CmdletBinding()]
    [OutputType([int])]
    Param
    (
        # The name of the existing VDSwitch the new VDPortgroup will be attached to
        [Parameter(Mandatory=$true,
                   ValueFromPipelineByPropertyName=$true,
                   Position=0)]
        $VDSwitch,

        # The Vlan tag assigned to the new VDPortgroup
        [int]
        [Parameter(Mandatory=$true,
                   ValueFromPipelineByPropertyName=$true]
        $VlanId

        # Name of the new VDPortgroup
        [Parameter(Mandatory=$true,
                   ValueFromPipelineByPropertyName=$true]
        $Name

        # The reference VDPortgroup whose settings will be copied. Only the VLAN tag will change
        [Parameter(Mandatory=$true,
                   ValueFromPipelineByPropertyName=$true]
        $ReferencePortgroup
    )

    Begin
    {
    }
    Process
    {
        New-VDPortgroup -VDSwitch $VDSwitch -Name $Name -ReferencePortgroup $ReferencePortgroup
        Set-VDPortgroup -VDPortgroup $Name -VlanId $VlanId
    }
    End
    {
    }
}
Copy the module
The next step is to copy the module to the appropriate place on your system. The Hey Scripting Guy! blog has covered this process fairly well (including a module you can use for importing other modules!), no need to recap it in detail. Open a new Powershell tab (Ctrl-T), open a new Script (Ctrl-N), paste his script, save it as Copy-Module.psm1, and hit F5 to import its contents. Last, take the lines below the Copy-Module function and run them, using the correct path for where you saved your two .psm1 files.
PS C:\> Test-ModulePath

PS C:\> Get-ChildItem -Path C:\users\rn7284\Documents -Include *.psm1,*.psd1 -Recurse | Foreach-Object { Copy-Module -name $_.fullName }
Now open a new tab (Ctrl-T). In the Command pane (View->Show Command Add-on if it disappears, no keyboard shortcut), type clone. Voila, your module is there without you having to do anything else! This module will be available in both PowerShell and PowerShell ISE without having to Import-Module, source a .ps1 file, or anything else. Our updated $DPGs.keys loop will now use the module as we intended.
When updating the module, be sure to update it in the ModulePath directory or, preferably, use the Copy-Module command to upload tested versions to the ModulePath.
Centralized Modules
The Copy-Module cmdlet from Hey Scripting Guy! adds modules to your user module directory, as you can see by checking the environment variable PSModulePath and the contents of the user and shared directories (Note: I’ve added an updated version of this to my GitHub repo so you don’t have to create it yourself):
PS C:\> $env:PSModulePath
C:\Users\rnelson0\Documents\WindowsPowerShell\Modules;C:\Windows\system32\WindowsPowerShell\v1.0\Modules\

PS C:\> cd c:\users\rnelson0\documents\WindowsPowerShell\Modules

PS C:\users\rnelson0\documents\WindowsPowerShell\Modules> ls

    Directory: C:\users\rnelson0\documents\WindowsPowerShell\Modules

Mode                LastWriteTime     Length Name
----                -------------     ------ ----
d----         2/28/2014  11:03 AM            Clone-VDPortgroup
d----         2/28/2014  11:03 AM            Copy-Module

PS C:\users\rnelson0\documents\WindowsPowerShell\Modules> cd c:\windows\system32\windowspowershell\v1.0\modules

PS C:\windows\system32\windowspowershell\v1.0\modules> ls

    Directory: C:\windows\system32\windowspowershell\v1.0\modules

Mode                LastWriteTime     Length Name
----                -------------     ------ ----
d---s        11/21/2010   1:20 AM            AppLocker
d---s        11/21/2010   1:14 AM            BitsTransfer
d----        11/20/2013   4:23 PM            CimCmdlets
d----        11/20/2013   4:23 PM            ISE
d----        11/20/2013   4:23 PM            Microsoft.PowerShell.Diagnostics
d----        11/20/2013   4:23 PM            Microsoft.PowerShell.Host
d----        11/20/2013   4:23 PM            Microsoft.PowerShell.Management
d----        11/20/2013   4:23 PM            Microsoft.PowerShell.Security
d----        11/20/2013   4:23 PM            Microsoft.PowerShell.Utility
d----        11/20/2013   4:23 PM            Microsoft.WSMan.Management
d----        11/20/2013   4:23 PM            PSDiagnostics
d----        11/20/2013   4:23 PM            PSScheduledJob
d----        11/20/2013   4:23 PM            PSWorkflow
d----        11/20/2013   4:23 PM            PSWorkflowUtility
d----        11/21/2010   1:14 AM            TroubleshootingPack
If your group is good about using version control and either regularly updates their repos and runs Copy-Module, or you have a hook that does it for them, everyone can have up to date versions of modules on their own profiles. However, if you have issues with that setup, you could always set up an RDP server and upload the modules to the shared module directory. In the Copy-Module function from Hey Scripting Guy!, change this one line
ORIGINAL:
 $UserPath = $env:PSModulePath.split(";")[0]
 $ModulePath = Join-Path -path $userPath `
               -childpath (Get-Item -path $name).basename

CHANGED:
 $GlobalPath = $env:PSModulePath.Split(";") | select -Last 1
 $ModulePath = Join-Path -path $GlobalPath `
               -childpath (Get-Item -path $name).basename
Re-run the module with F5 and then Copy-Module as normal. Be sure to delete the contents of $UserPath to avoid conflicts and restart the ISE. Anyone else who has modules in the old $UserPath will need to do the same.
UPDATE: Anthony Spiteri released his IOPS Metrics article.
