Discovering Puppet module dependencies for use with r10k

Currently, r10k does not perform dependency resolution. It’s on the roadmap, but not here yet (RK-3 tracks the effort). Until then, it’s up to you to determine the module dependencies. You can do this by visiting a module’s forge page, then clicking on dependencies, then clicking on each dependency’s forge page and clicking on dependencies until you reach the bottom. That’s pretty boring and a recipe for mistakes. Let’s look at how to automate this.

If you use puppet module install, it will install the module and all its dependencies for you. Give it a module and a new temporary directory, to ensure we don’t already have a dependency in our path, and you’ll end up with what you need.

Puppet module dependencies fig 1

In the past, I’ve shown how you can then use puppet module list and some search and replace patterns to convert to a Puppetfile, but it was all manual and it was scattered through the blog article. Here are some of the patterns you need, in vi format:

:%s/\s*[└┬├─]*\s/mod "/
:%s/ (v/", "/
:%s/)/"/
:%s/-/\//g

Vi is interactive, though, we can do better. Using the magic of sed, I generated a tool called generate-puppetfile that will install the specified modules in temp directories and use the module listing to build a Puppetfile for you.

Puppet module dependencies fig 2

I renamed the utility from depconvert to generate-puppetfile for clarity.

Download the utility (git clone https://github.com/rnelson0/puppet-generate-puppetfile.git). Run it and pass the names of modules you want to use. Currently there is no real error checking to be had, so if you enter an invalid name or no name, you won’t get what you want, but errors will be passed to the screen. I hope this helps!

NFS Export Settings for vSphere

Over the past few days, I’ve had to set up an NFS export for use with vSphere. I found myself frustrated with the vSphere docs because they only seem to cover the vSphere side of the house – when discussing the export that vSphere will use, the docs simply said, “Ask your vendor.” If you’re enabling NFS on your SAN and they have a one-click setup for you or a document with settings to enable, great, but if you’re setting up on a bare metal server or VM running Linux like me, you don’t have a vendor to ask.

Since I didn’t have a guide, I took a look at what happens when you enable NFS on a Synology. I don’t know if this is optimal, but this works for many people with the defaults. You can replicate this in Control Panel -> Shared Folders -> Highlight and Edit -> NFS Permissions. Add a new rule, add a hostname or IP entry, and hit OK. Here’s what the defaults look like:

NFS Exports fig 1

Let’s take a look at what happened in the busybox shell. SSH to your Synology as root with the admin password. Take a look at the permissions on the mount path (e.g. /volume1/rnelson0) and the contents of /etc/exports.

NFS Exports fig 2

(there is no carriage return at the end of the file, the ‘ds214>’ is part of the prompt not the exports contents)

A working mode for the directory is ‘0777’ and there’s a long string of nfs options. They are described in detail in the exports(5) man page. Here’s a high-level summary of each:

  • rw: Enable writes to the export (default is read-only).
  • async: Allow the NFS server process to accept additional writes before the current writes are written to disk. This is very much a preference and has potential for lost data.
  • no_wdelay: Do not delay writes if the server suspects (how? I don’t know) that another write is coming. This is a default with async so actually has no specific benefit here unless you remove async. This can have performance impacts, check whether wdelay is more appropriate.
  • no_root_squash: Do not map requests from uid/gid 0 (typically root) to the anonymous uid/gid.
  • insecure_locks: Do not require authentication of locking requests.
  • sec=sys: There are a number of modes, sys means no cryptographic security is used.
  • anonuid/anongid: The uid/gid for the anonymous user. On my Synology these are 1025/100 and match the guest account. Most Linux distros use 99/99 for the nobody account. vSphere will be writing as root so this likely has no actual effect.

I changed the netmask and anon(u|g)id values, as it’s most likely that a linux box with a nobody user would be the only non-vSphere client. Those should be the only values you need to change; async and no_wdelay are up to your preference.

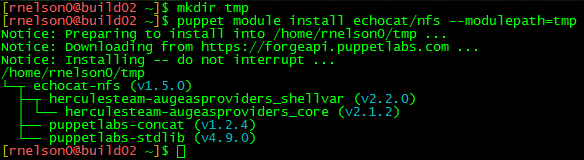
If you use Puppet, you can automate the setup of your NFS server and exports. I use the echocat/nfs module from the forge (don’t forget the dependencies!). With the assumption that you already have a /nfs mount of sufficient size in place, the following manifest will create a share with the correct permissions and export flags for use with vSphere:

node server {
  include ::nfs::server

  file{ '/nfs/vsphere':
    ensure => directory,
    mode   => '0777',
  }
  ::nfs::server::export{ '/nfs/vsphere':
    ensure  => 'mounted',
    nfstag  => 'vsphere',
    clients => '10.0.0.0/24(rw,async,no_wdelay,no_root_squash,insecure_locks,sec=sys,anonuid=99,anongid=99)',
  }
}

To add your new datastore to vSphere, launch the vSphere Web Client. Go to the Datastores page, select the Datacenter you want to add the export to, and click on the Related Objects tab. Select Datastores and the first icon is to add a new datastore. Select NFS and the NFS version (new to vSphere 6), give your datastore a name, and provide the name of the export (/nfs/vsphere) and the hostname/IP of the server (nfs.example.com). Continue through the wizard, checking each host that will need the new datastore.

NFS Exports fig 3

Click Finish and you have a datastore that uses NFS! You may need to tweak the export flags for your environment, but this should be a good starting point. If you are aware of a better set of export flags, please let me know in the comments. Thanks!

Customizing bash and vim for better git and puppet use

Welcome back to our Puppet series. I apologize for the extended hiatus and thank you for sticking around! As an added bonus, in addition to inlining files, I’m including links to the corresponding files and commits in my PuppetInABox project so you can easily review the files and browse around as needed. I hope this is helpful!

Today, we will look at improving our build server. The build role is a centralized server where we can do our software development, including work on our puppet code and creating packages with FPM. When we work with git, we have to run git branch to see what branch we’re in. If you’re like me, this has led to a few uses of git stash and in some cases having to redo the work entirely once you start committing on the long branch. To help, we’re going to add the currently-active branch name of any git directory we are in to the PS1 prompt. We also are doing a lot of edits of *.pp files and we don’t have any syntax highlighting or auto-indenting going on. We can fix that with a few modifications, and we’ll discuss where additional customizations can be made.

Continue reading

Hiera-fy your Hiera setup

In 2014, we set up our puppet environment and we’ve spent the first half of 2015 improving the configuration. In that time, we installed hiera, were introduced to it through the role/profile pattern, focused on separating the data from the code and moving it into hiera, and most recently on an improved controlrepo that modified the hiera layout. We have been using hiera the whole time, and there’s a lot we can do to improve how we use it still.

Manage Hiera with Puppet

Our initial hiera.yaml was simple and static. With our improved controlrepo layout, the new hiera.yaml file is more dynamic. A problem still remains: we are configuring hiera manually! You may have a hiera.yaml in your controlrepo or even a bootstrap.pp file for your initial puppet master. We have also been managing the hiera package manually in profile::hiera. This addresses the problem in the short term but adds to our administrative overhead – anytime we update the hiera config, we need to do so in these files as well as on the master itself.

Continue reading

Configuring an R10k webhook on your Puppet Master

Now that we have a unified controlrepo, we need to set up an r10k webhook. I have chosen to implement the webhook from zack/r10k. There are other webhooks out there – I’m a huge fan of Reaktor – but I chose this because I’m already using this module and because it is recommended by Puppet Labs. It’s an approved module, to boot!

Update: The zack/r10k module has migrated to puppet/r10k, which should be used instead. I’ve commented out sections that are incompatible with the most recent versions of the module, but as this article is now 2 years old, there may be other changes in surrounding modules you will become aware of, too.

Module Setup

The first step is to make sure the module is installed along with its dependencies. There are no conditional dependencies in a Puppet module’s metadata.json, so you can skip puppetlabs/pe_gem and gentoo/portage if you’d like. On the other hand, there are no ill side effects from having the modules present unless you were to use them for some reason. This is an opportunity to up the version on some pinned modules as well, such as stdlib, as long as you do not increment the major version. If the major version increases, there’s a significant chance your code will have some breakage, it’s best to do that in a separate branch.

I encountered a bug with zack/r10k v2.7.3 (#162). This bug is fixed in v2.7.4. Be sure to upgrade!

Continue reading

Puppet Tutorials: Check out Puppetinabox instead

Quick note: I am deprecating my individual repos – role, profile, hiera etc – that I have used throughout the Puppet series. I will be doing representative work within the Puppetinabox repositories, mostly the controlrepo. I’m not sure when I’ll shut down the repos entirely, not until after I update old links, of course. Some of the older history will eventually be lost, but it’s mostly primitive versions of the code you shouldn’t want to copy. If you actually want the code, check out the repos now, while you still can:

Preventing Git-astrophe – Judicious use of the force flag

I’d like to tell a tale of a git-astrophe that I caused in the hope that others can learn from my mistakes. Git is awesome but also very feature-ful, which can lead to learning about some of those features at the worst times. In this episode, I abused my knowledge of git rebase, learned how the -f flag to git push works, and narrowly avoided learning about git reflog/fsck in any great detail.

Often times, you will need to rebase your feature branch against master (or production, in this case, it was a puppet controlrepo) before submitting a pull request for someone else to review. This isn’t just a chance to rewrite your commit history to be tidy, but to re-apply the changes in your branch against an updated main branch.

For instance, you created branch A from production on Monday morning, at the same time as your coworker created a branch B. Your coworker finished up her work on the branch quickly and submitted a PR that was merged on Monday afternoon. It took you until Tuesday morning to have your PR ready. At this time, it is generally adviseable to rebase against the updated production to ensure your branch behaves as desired after applying B‘s changes. Atlassian has a great tutorial on rebasing, if you are not familiar with the concept.

Continue reading

Improved r10k deployment patterns

In previous articles, I’ve written a lot about r10k (again, again, and again), the role/profile pattern, and hiera (refactoring modules and rspec test data). I have kept each of these in a separate repository (to wit: controlrepo, role, profile, and hiera). This can also make for an awkward workflow. On the other hand, there is great separation between the various components. In some shops, granular permissions are required: the Puppet admins have access to the controlrepo and all developers have access to role/profile/hiera repos. There may even be multiple repos for different orgs. If you have a great reason to keep your repositories separate, you should continue to do so. If not, let’s take a look at how we can improve our r10k workflow by combining at least these four repositories into a single controlrepo.

Starting Point

To ensure we are all on the same page, here are the relevant portions of my Puppetfile:

Continue reading

Why not Puppet?

Alternatively: Common mistakes made when adopting Puppet.

I love me some Puppet, and anyone who knows me will tell you I’ll talk about it and configuration management as long as you let me. However, sometimes it’s not the answer people expect it to be. Is it even the right tool? As a counterpoint to Why Puppet?, let’s look at some potential use cases and see whether they are a good fit. These use cases have been gathered from my own usage, ask.puppetlabs.com, #puppet on IRC, and some user stories recounted to me and are presented in no specific order. Special thanks to Ryan McKern for some additional stories and editing.

Is it possible to run something only if the file/user/package/whatever is present? (IRC, nearly every day)

The situation is often presented as, “$Thing won’t install without me answering some questions or providing an answer file, can I get Puppet to manage it only if the package is installed?” Yes, but also no.

Continue reading

Deploying MySQL with Puppet, without disabling SELinux

I’ve been vocal in the past about the need to not disable SELinux. Very vocal. However, SELinux can be difficult to work with. I was reminded of how difficult while deploying MySQL recently. Let’s take a look at how to iron out the SELinux configuration for MySQL, and how to deploy it with Puppet I will be using CentOS 6.6 in this article. The package names and SELinux information may vary if you use another distribution.

MySQL Design

Let’s review the design of the MySQL installation before continuing. For the most part, it’s a standard install, we’re not doing any elaborate tuning or anything. All the passwords will be ‘password’ (clearly you should change this in production!). All the anonymous users (@localhost, root@localhost, etc.) will have a password set. An additional ‘replication’ user is created so multiple databases can be replicated and example replication settings are included. The test databases are removed and a single user/database pair of wikiuser/wikidb will be created. We won’t do anything with the database, it’s just an example that can be duplicated as needed.

Continue reading